Hit the "REBUILD" button. The building is created in 3D (just a big cobblestone for now).
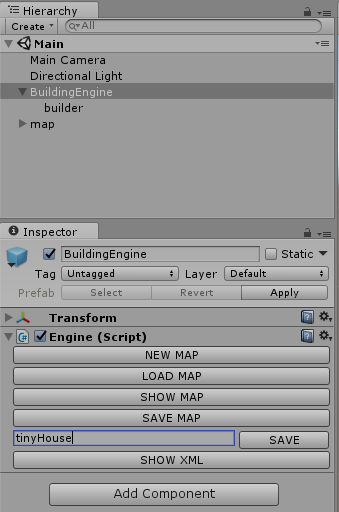
It's time to save our work. Select the BuildingEngine gameObject in the Hierarchy. Hit the "SAVE MAP" button. A textfield appears, fiil it with "tinyHouse" and Hit "SAVE" The data are saved in XML format. A file is created in the "saves" folder. To load the map in the future, select the BuildingEngine gameObject in the Hierarchy, hit the "LOAD MAP" button and hit the "TINYHOUSE" button.
First of all, expand the BuildingEngine gameObject, and select the builder gameObject. Find and expand the "map builder" component, and uncheck both "draw facades" and "draw roofs" checkboxes. This is useful to see the rooms in the building when we create them.
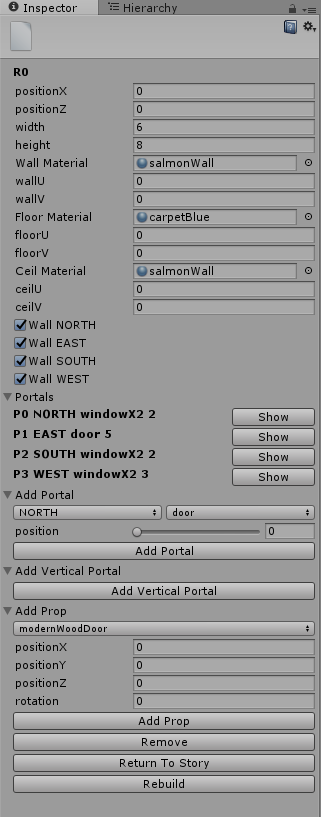
Hit the "ADD ROOM" button to create the R0 room. As R0 is located at the left border of the story, position X is set to 0. As R0 is located at the top border of the story, we set position Z to 0. We give a width of 6, and height of 8, according t the floorplan. We choose "salmonWall" as wall material and ceil material, and "carpetBlue" as floor material.
The R0 room is now complete, we'll add portals later. Hit the "Return to Story" button, and "ADD ROOM" button to create the room R1.
For the room R1, the position on the X axis is 6 units from the left border of the story. The we set the positionX to 6, the wall materail and ceil material to "salmonWall", the floor materail to "parquet". Go back to story, add a room.
For the room R2, the position of the room is 4 units from the top border, so we set Position Z to 4. Position X = 6. Set the material with the same values as the room R1.
R1 and R2 seems represents an only room, but we want remove the ceiling for the room R1, and keep it for the room R2, so we have to create two separates rooms. To remove the wall between the two, find the "wall NORTH" of the R2 Inspector, and uncheck it. The southern wall is also uncheck in the R1 Inspector.

Finally, create the room R3. Position X = 10, width = 6, height = 8. "salmonWall" is used as wall and ceil material, and "floorTiled" as floor material.
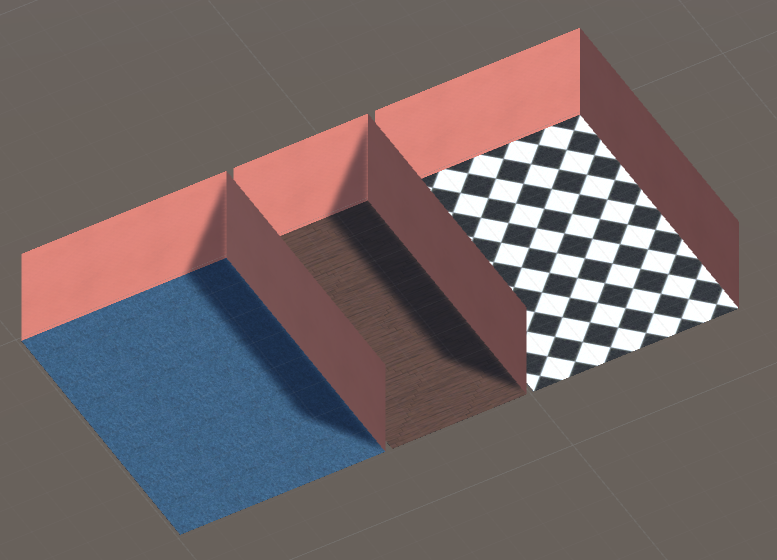
Hit the "Rebuild" button to recreate the building and see the rooms of the firt floor appears. Remember, for now we doesn't draw the facade neither the roof.
© 2017 Magyc Pixel. All rights reserved | Design by W3layouts